
Over the past few years as we ventured into using switch/spey rods on the Great Lakes tributaries, we fell in love with spey casting. As the steelhead season came to a close we routinely found ourselves using single hand spey tactics on our trout streams. More often than not we reached for the second handle that wasn't there. We yearned for it, to make things a little more easier. Adam decided to take matters into his own hands and began performing surgery on several cheap low end rods in his arsenal. This culminated this past winter with the creation of the Eagle Claw Switch Rod.

First One: May 2010
A Spinning Rod Grip and Some Electrical Tape

4wt. St. Croix
Materials List:
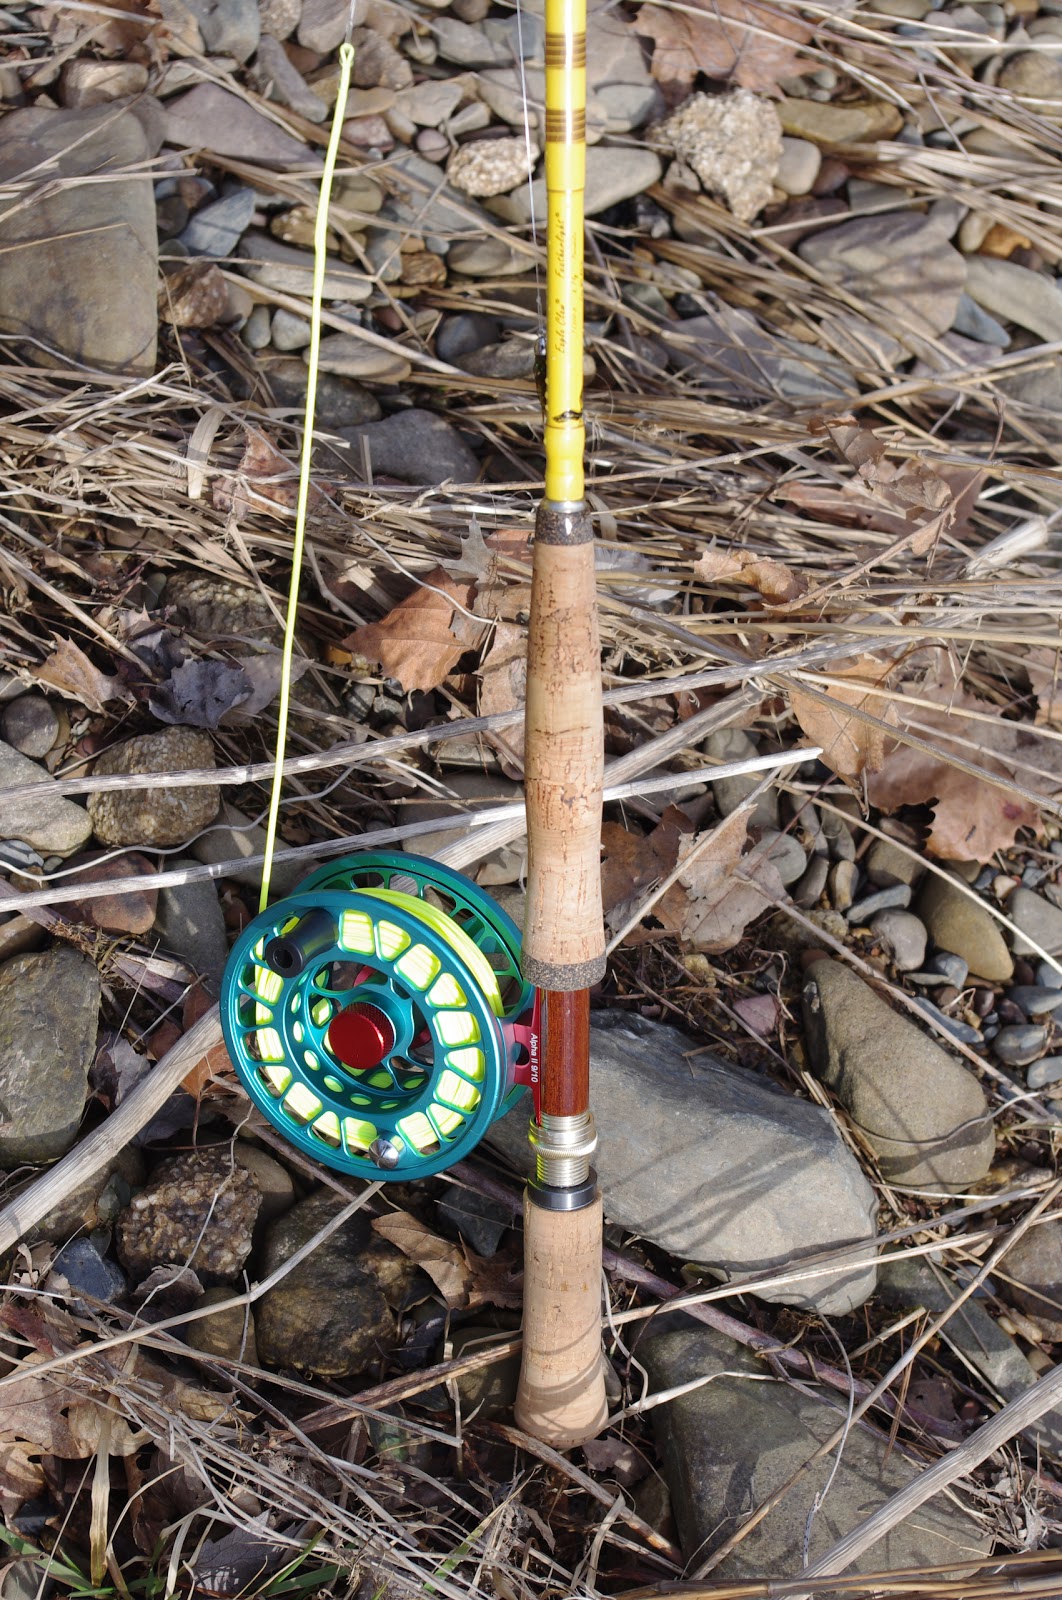
Eagle Claw Fiberglass 8' 5 Weight
Spey/Switch Rod Grip
5 Minute Epoxy
Arrow Shaft
Saw
Files
Sand Paper
Vice
Time: 30 minutes

Begin by using a hack saw to cut off the back end of the reel seat. In the picture below, I am actually sawing in the wrong spot since I am sawing through solid nickel. You should actually cut at the beginning of the rings. Once cut, you expose the blank in the reel seat.


In order to properly seat the switch/spey handle onto reel seat, you will have to sand down your cut as well as break apart some of the blank. It will depend entirely upon the handle you have bought.


We used an arrow shaft to connect the switch/spey handle to the reel seat and also add some extra weight to balance out the rod. Insert five minute epoxy into the grip and along the arrow shaft. We used a circular motion to evenly spread the epoxy out in the handle. Make sure that the arrow dries in a vertical position.

Once dried, we repeated the same thing to insert the arrow shaft and grip into the fly rod blank. In this case, the arrow shaft was cut to a length where it only extended past the cork a few inches. Let it dry and the rod will be ready to use as soon as the epoxy dries.


First Attempt: Eagle Claw Switch

So far, we've had a lot of fun with this rod. It has landed carp up to sixteen pounds and is a really fun indicator nymphing tool if you like really long drag free drifts. The cork will probably fall apart in your hands as you fish it and you can find better performance buying a 5 wt. switch but it wouldn't be an Eagle Claw would it? This is a cheap alternative with the emphasis on: FUN.
Enjoy it.


12 comments:
Nice clean job. Looks very professional.
Mark
Where the hell can you find eagle claw fly rods? My very first rod (which was a spinning rod) was an eagle claw and I loved it. I've been looking for an eagle claw fly rod since I began fly fishing many moons ago and have never been able to find one. Cool idea on the arrow shaft.
Walmart sells them. You can order them from the internet as well...
I love this. Thanks for sharing Mark.
very cool
Ok, have the rod and arrow shaft, now where to purchase the switch/spey grip
Thanks
Great stuff guys....interesting approach too. Might have to give it a go...
Awesome idea. Being a handy man myself really a great idea and process. I've got to make one now.
@ Randy- sorry for the delayed reply, I've been unplugged for about two weeks...
Adam actually purchased them at the Somerset Fly Fishing Show back in February from a booth. Thats about as much as I know about where they are from. I don't know the brand name either.
Sorry.
Hey have you ever tried using crossbows? I thought it would be something worth a try along with fly fishing. I still want to Find Out More about the stuff. I am still a novice on both arts. I really appreciate blogs like these. It comes in handy if you want to add to your knowledge. Thanks for sharing.
Wow nice post! You should try the Sage One. My husband is in love with it.
EBay has tons of them
Post a Comment